
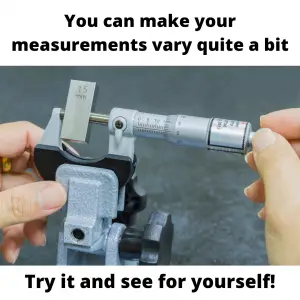
Click, click, click.
Is that the sound of a good measurement?
If you follow our guide to using your micrometer ratchet, then maybe. You can’t say we didn’t try.
Some of these tips might just surprise you. After all, it is all the little details coming together that let you get a good reading from your micrometer.
Check them out but remember that no amount of reading will beat some quality time practicing with your mic.
Table of Contents
ToggleWhat is the ratchet on a micrometer used for?
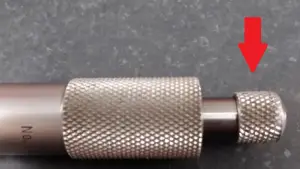
Ratchets on a micrometer are used for consistency of measurement. The ratchet allows the micrometer user to apply a consistent amount of force to the tool resulting in more consistent measurements.
Micrometers are capable of taking measurements with a great deal of accuracy, most often to 0.0001” or 0.002mm. That is about 30 times smaller than a human hair.
The ratchet mechanism on a micrometer limits the amount of force that can be applied to applied to the tool.
Imagine taking a measurement with your micrometer by gently closing the tool on the part you are measuring. By doing this you get a measurement reading of 0.5000”.
Now with that same part you twist the thimble as hard as you can. Now the micrometer reads .4995”. Notice how the excess force has caused your reading to change.
Closing the micrometer quickly can have the same effect (too much force) and the ratchet mechanism will help in this situation as well.
Ratcheting mechanisms are especially helpful for anyone who is not used to working with a micrometer. The biggest thing to remember is that they aren’t perfect and there are many old micrometers out there with ratchets that don’t function properly.
Take multiple measurements and verify your tool to a known standard such as a calibrated gauge block to give yourself the best chance at an accurate measurement.
Will using a ratchet stop on your micrometer make your measurements more accurate?
This one is tricky.
No, using a ratchet stop will not immediately mean that your readings are more accurate. They can however make it easier to get accurate measurements.
If you are new to working with a micrometers we recommend you use the ratchet mechanism. But don’t assume this removes you from the equation. You should still do your best to be consistent in your measurements.
This means using a fairly gentle and above all consistent amount of force when using your micrometers. Spin it as fast as you want (within reason) until you are just about to contact the part you will measure. Improving the accuracy of your measurements happens in those last few thousandths of an inch.

Count your clicks
To improve your consistency, use the same amount of ratchet clicks when taking your measurements. We recommend starting with three clicks.
Ratchet or not, make sure to take multiple measurements to improve your skill using your micrometer. In fact, with enough practice, many people prefer to use their micrometer without the ratchet and instead relying on their “feel or touch” with the micrometer.
This isn’t beginner level stuff though, it will take some time and practice to develop the touch and even once you have gotten good with your tool, you should still be taking multiple measurements.
It only takes a spec of dust or lint, or a slight twist of your micrometer to give a measurement that is a few “thou” off. A few thousandths can often be the difference between perfect parts and scrap.
Ratchet stops vs friction thimbles

Ratchets aren’t the only type of mechanism used on micrometer to improve accuracy. Not only are there multiple types of ratchets with different levels of force, but there are also other options from different manufacturers such as friction thimbles.
With a friction thimble, once a certain amount of force has been applied the thimble will spin freely. No click, click, click.
Friction thimbles are still subject to the same issues as ratchet stops. They still require you to be consistent with the amount of force applied and it is best practice to take multiple measurements.
Friction thimbles, like ratchets, will lessen the effect that the micrometer user will have on their measurements, but they don’t eliminate that effect.
Tips for getting the most accurate measurements with your micrometers
The goal when using a micrometer is always to get the most accurate reading possible. To do this follow the tips below and give yourself the best shot at getting that measurement right on the money each and every time.
Keep it clean

Your micrometer, your part, your workspace. Just keep everything clean.
Dirt, grime, lint, and oil are all enemies of accuracy. Clean everything with low lint wipes whenever possible. A quick visual inspection can help you determine whether your tool and part are free of contaminants.
Verify your micrometer
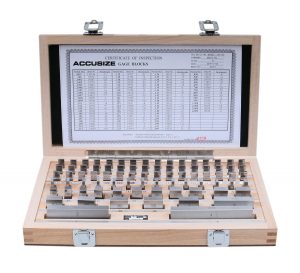
Whenever possible, check your tool at a size as close to the measurement size you are checking as feasible. If you are going to measure a 0.510” thickness, then grab a calibrated 0.500” gauge block and give it a quick check. This will provide some confidence that your tool is functioning correctly.
I always say that you never know what happened to your micrometer when you weren’t looking. Don’t think your kids or coworker wouldn’t knock it on the concrete floor, give a shifty glance around, put it back on your workbench and then walk away never saying a thing.
Right measurements are at right angles

You should be measuring your parts normal, or 90 degrees, to the surface being measured. What this means is that if you try to take a reading and your mic is cock-eyed, then you will get a bad measurement.
When at an angle other than 90 degrees, you will be measuring the hypotenuse of a triangle which will result in a larger than actual measurement.
This can largely be avoided by using a slight, gentle rocking of your micrometer when taking your measurements. With a little practice, you will feel the tool and part settle in and know that you aren’t getting a crooked measurement.
Be consistent
I covered it quite a bit earlier, but it is so important I want to touch on it again.
Consistency is king when it comes to measurement. Practice, practice, practice and you will develop that consistency. Some of it is just muscle memory so grab a known standard such as a gauge block or the standards that come with your mics to practice with. Measuring them over and over will allow you to develop that consistent form and force that will give you the most accurate readings possible.
Take multiple measurements
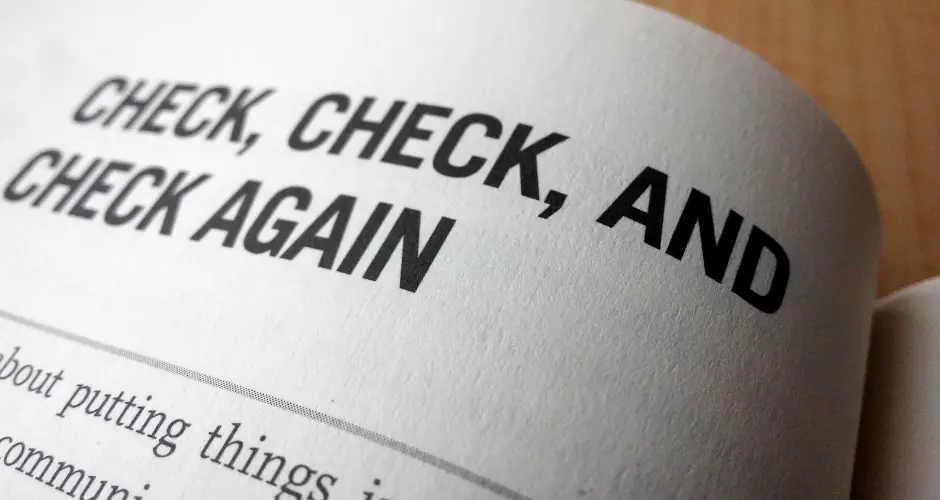
Even the best machine shop inspectors can get a bad reading once. The tolerances are just too tight and the margin of error is too small.
A good inspector might get one bad reading, but you can bet that they won’t get three in a row.
Check your part multiple times to increase your confidence that you got a good reading. If you find that your measurements vary, then practice some more on a known size to work on your feel and form.
Check your tool again when finished measuring
Imagine you just finished taking multiple readings on a dozen parts with your micrometer. What should you do now?
Go check a gauge block! If you don’t have one, then at least check the zero of your micrometer. Too often something can happen to cause your measuring tool to be out of whack.
If you check the tool when you start and check it when you are done then you will only add to the confidence that all the measurements taken in between were accurate.
Safe storage
Take care of those precision measuring tools. If it came with a case, then put it back in the case and stash it in a desk, cabinet or somewhere else out of harms way.
Keep them away from those who would do harm to your precious instruments. I have never known anyone to have regretted putting their tools away and locking them up.